The Ultimate Setup Guide for Your Lg Ultragear 39Gs95Qe B Gaming Monitor
Introduction
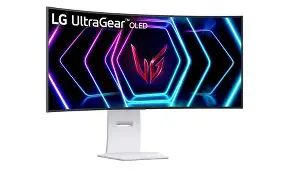
The LG UltraGear 39GS95QE-B positions itself as a premium ultrawide aimed at gamers, content creators, and power users who want immersive visuals and competitive responsiveness in one package. This guide walks through what to expect from the monitor, how to set it up for different real-world use cases, practical tips to get the best picture and performance, and considerations buyers typically care about. The goal is to provide an actionable, user-focused walkthrough so owners can move from unboxing to optimal daily use with minimal guesswork.
First Impressions and Key Characteristics
Out of the box, the UltraGear 39GS95QE-B is notable for its wide screen real estate and a design that blends gamer aesthetics with a professional finish. The monitor targets those who want an expansive field of view for immersive games like simulation racing, space and flight sims, and open-world titles, while also offering practical benefits for productivity—multiple windows side-by-side, a comfortable timeline view for video editors, and a wide canvas for developers and designers.
Rather than focus on marketing jargon, it's helpful to think of this monitor in terms of a few practical attributes buyers care about: screen width and aspect ratio (for immersion and multitasking), panel contrast and color (for image quality), refresh rate and latency (for smooth, responsive gaming), and connectivity (for modern PCs and consoles). The rest of this article describes how to use those attributes to tailor a setup to your needs.
Detailed Product Analysis
Build, Ergonomics, and Ports
The UltraGear 39GS95QE-B typically arrives with a stable stand that offers tilt and height adjustment; some users may prefer a VESA arm for more flexibility. The monitor's bezel and build quality are designed to minimize distractions while delivering a solid mounting platform for multi-monitor desks or single-monitor ultra setups.
Connectivity is a critical practical consideration. The monitor includes modern digital inputs intended to support high bandwidth: at minimum, expect multiple HDMI and DisplayPort inputs as well as USB ports for hub functionality. These ports make it straightforward to attach a gaming PC, console, laptop, and peripherals without constant cable swapping. Owners should confirm which ports are present on their specific unit and choose cables that match the required bandwidth for high refresh rates and high resolutions.
Panel Characteristics and Image Quality
The screen aims to deliver wide color coverage and strong contrast, which improves perceived detail, HDR highlights, and black levels—useful in dark-room gaming and content creation. The native wide aspect ratio increases horizontal workspace and enhances peripheral immersion in compatible titles. While color-critical professionals may still prefer a reference display, the UltraGear offers a balance between gaming performance and good color accuracy out of the box.
Refresh Rate, Latency, and Adaptive Sync
Competitive and fast-paced gamers will focus on the monitor's refresh rate and input latency. The UltraGear is engineered to deliver high refresh rates and low response times alongside adaptive-sync technologies that reduce tearing and stutter during variable-frame-rate gameplay. For competitive play, pairing the monitor with a capable GPU and enabling the appropriate variable refresh option in the GPU control panel provides the smoothest experience.
HDR and Brightness Considerations
HDR performance depends on peak brightness, local dimming (if present), and color volume. The monitor supports HDR content and can improve highlights and color rendition in HDR-enabled games and media. However, HDR experiences vary by environment—ambient light, room setup, and source content influence perceived HDR quality—so adjust expectations accordingly and use calibration steps described below for best results.
Real-World Use Cases
It helps to think about how buyers use the UltraGear in practice:
Shop the latest Laptops & Computers picks on Amazon.
Shop Amazon →- Sim Racing and Flight Sims: The wider field of view enhances peripheral awareness; single-monitor setups reduce bezel interruptions and increase immersion in cockpit-style titles.
- Competitive FPS and Esports: High refresh rates and low latency are valuable; players should tune settings for maximum responsiveness even if it means slightly reducing post-processing or extreme HDR modes.
- Productivity and Content Creation: Editors and designers benefit from the extra horizontal pixels for timelines and tool palettes; color calibration improves grading accuracy.
- Multimedia and Streaming: The monitor is well suited to widescreen movie playback and multitasking while streaming—chat windows and streaming software can stay visible alongside the game.
Step-by-Step Setup Guide
1. Unboxing and Physical Setup
Set aside a clean, large surface for unboxing. Assemble the stand according to the manual or attach a VESA mount if preferred. Position the monitor at eye level: the top third of the screen should be roughly at eye height in a seated position. Keep 20–35 inches (50–90 cm) between eyes and screen as a guideline for comfortable viewing of ultrawide panels.
2. Cable and Input Selection
Choose the right cable for the highest supported refresh rate and resolution. If the monitor supports high refresh rates via DisplayPort, use a certified DisplayPort cable. For HDMI connections, ensure the cable supports the required HDMI version. Avoid using legacy adapters when possible, as they may limit bandwidth. Connect power and any USB upstream ports if the monitor serves as a hub.
3. OSD and Initial Configuration
Power on the monitor and use the on-screen display (OSD) to set input source, color mode, and gaming presets. Recommended initial settings:
- Brightness: Tune to suit ambient light—lower in dim rooms to reduce eye strain, higher in bright rooms for HDR visibility.
- Picture Mode: Use a…
- Set color temperature to a neutral preset (often labeled "6500K" or "Warm/Normal").
- Reduce sharpness and dynamic contrast settings for natural detail reproduction.
- If available, use built-in sRGB or factory-calibrated modes for web content and design tasks.
For professionals: consider a hardware colorimeter and software (e.g., DisplayCAL) to create a monitor profile tailored to print or video standards.
5. Optimize for Gaming
Tune in-game settings for the target frame-rate: when aiming for maximum responsiveness, reduce extremely demanding graphics effects that do not impact competitive performance. Enable the monitor’s low-latency or game-response settings if available, but verify there’s no undesirable artifacting. Use the GPU driver to cap frame rates if necessary to stabilize VRR behavior and reduce micro-stutter.
6. Fine-Tuning for Consoles
Consoles may require specific HDMI modes; enable the console’s performance/HDR modes and set the monitor’s HDMI input to the correct mode. Be aware consoles often run at different native resolutions or frame-rates—check the in-console display settings and match the monitor’s capabilities for the best visual experience.
7. Maintenance and Firmware
Keep the monitor’s firmware up to date. Check LG’s official support channels (not linked here) for firmware notes and follow the manufacturer’s instructions to apply updates. Avoid placing the monitor in direct sunlight and clean the screen with a lint-free cloth and manufacturer-recommended cleaner.
Find top-rated Laptops & Computers products at great prices.
See Deals →Pros & Cons
- Pros
- Expansive ultrawide screen enhances immersion and productivity
- High-contrast panel yields deep blacks and vibrant colors
- Designed for low latency and high refresh performance
- Rich connectivity options reduce adapter needs and simplify multi-device setups
- Practical ergonomics and build quality suitable for long sessions
- Cons
- Larger footprint requires a generous desk and careful placement
- Some advanced features (HDR peak brightness, local dimming) depend on room conditions and source content
- Color-critical professionals may still prefer specialized reference monitors for absolute accuracy out of the box
- Potential for burn-in risk over very long periods on static content if the panel is self-emissive (follow manufacturer guidance)
Comparison Snapshot
Model Screen Size / Aspect Panel Type Refresh & Latency Focus HDR Best For LG UltraGear 39GS95QE-B 39" ultrawide / 21:9 High-contrast wide-gamut panel High refresh rate, low latency, VRR-ready HDR support for games and media Immersive gaming, multitasking, streaming 34" 21:9 Ultrawide (IPS) 34" ultrawide / 21:9 IPS (wider viewing angles) Good refresh rates, slightly higher response times Basic HDR or HDR emulation Productivity-first users, color grading with calibration 27" 16:9 4K 144Hz 27" regular / 16:9 IPS or VA Very high pixel density; excellent for competitive gaming at mid-range distances Enhanced HDR depending on model Competitive FPS players who want high pixel density Buying Guide: What to Consider Before Purchasing
Choosing a high-end ultrawide requires matching the monitor to the user’s primary activities. Below are the practical criteria to weigh.
Use Case First: Gaming vs. Content Work
Decide whether gaming performance or color-critical work is primary. The UltraGear is optimized for gaming-first scenarios that still provide very good color performance. If absolute color accuracy for print or film is the priority, plan on professional calibration or a reference monitor in tandem.
Desk Space and Ergonomics
Measure desk depth and width before buying. Large ultrawides need space for comfortable viewing distances and ergonomic alignment. If desk space is limited, consider a monitor arm or a slightly smaller ultrawide.
Connectivity and Future-Proofing
Look for multiple high-bandwidth inputs, a USB hub, and convenient audio out if the monitor will be a central centerpiece. Confirm which cable standards the monitor supports and that your GPU or console can drive the monitor at the desired settings.
Panel Longevity and Maintenance
Ask about manufacturer recommendations for burn-in mitigation (if the panel is self-emissive), warranty coverage, and firmware support. Consider how long the panel will remain usable for your workflow—some buyers trade off perfect long-term color stability for immersive visuals.
Budget and Alternatives
Match the monitor to the budget while understanding trade-offs: ultra-high refresh 4K gaming monitors can be more expensive and require more GPU horsepower, while ultrawides offer immersion and workspace without the strict GPU demands of native 4K. Consider the total system cost required to drive the monitor the way one intends to use it.
Troubleshooting and Tips
- No signal or wrong refresh rate: Verify input and cable type; ensure GPU output is set to the correct resolution and refresh rate in the OS display settings and GPU control panel.
- VRR not engaging: Enable adaptive sync in both the monitor OSD and the GPU driver; some systems require the monitor to be the primary display.
- Color looks off: Reset to a neutral picture mode and follow the simple calibration steps earlier; use factory sRGB for consistent web content rendering.
- Visible ghosting or motion trails: Experiment with overdrive/response settings in the OSD—higher overdrive reduces trails but can introduce inverse ghosting; find the sweet spot for the panel.
Conclusion
The LG UltraGear 39GS95QE-B is a compelling option for users seeking an immersive ultrawide experience that balances gaming performance and everyday productivity. Its wide canvas and performance-oriented features make it especially well suited to simulation enthusiasts, streamers who benefit from extra screen space, and gamers who prioritize immersion. Proper setup—choosing the right cable, enabling adaptive sync, calibrating color for your environment, and tuning in-game settings—unlocks the monitor’s strengths and minimizes common pitfalls. Buyers should weigh desk space, the intended use case, and required system horsepower before purchasing, but for many, the UltraGear offers a versatile platform that elevates both play and work.